|
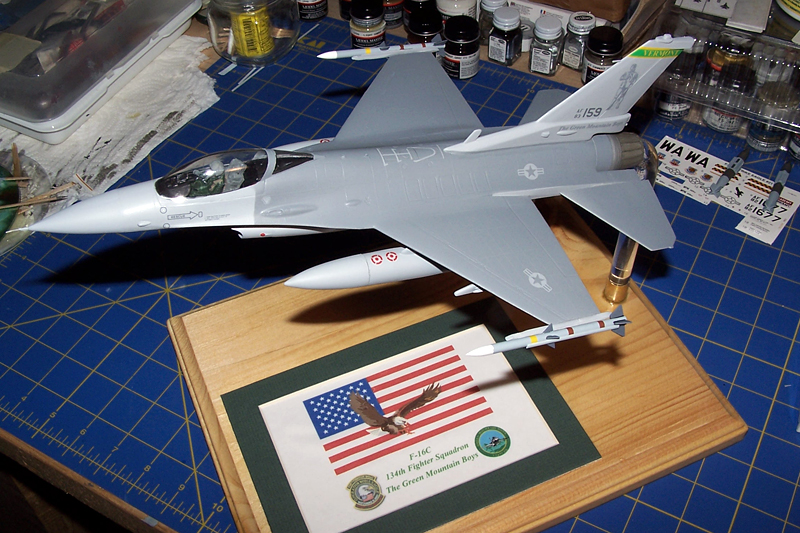
The majority of my
models lately are displayed in the flying configuration. Over the years, I have tried
different methods while viewing others' displays for ideas, especially Lyle
"Tilt" Katchur's Canadian Hornets. Making modifications to a
model for a stand can be intimidating at first, but once you do a couple and
plan for it in the very beginning, it becomes just another step in building the
model. You may want to practice on a scrap or cheap model to get the hang of it.
I see questions quite a bit on the forums, and hopefully this article will help
shed some light on the methods I use.
Planning
Planning up front is critical as most steps have to be done to the model during
the early phases of building. You don't want to try and make provisions for the
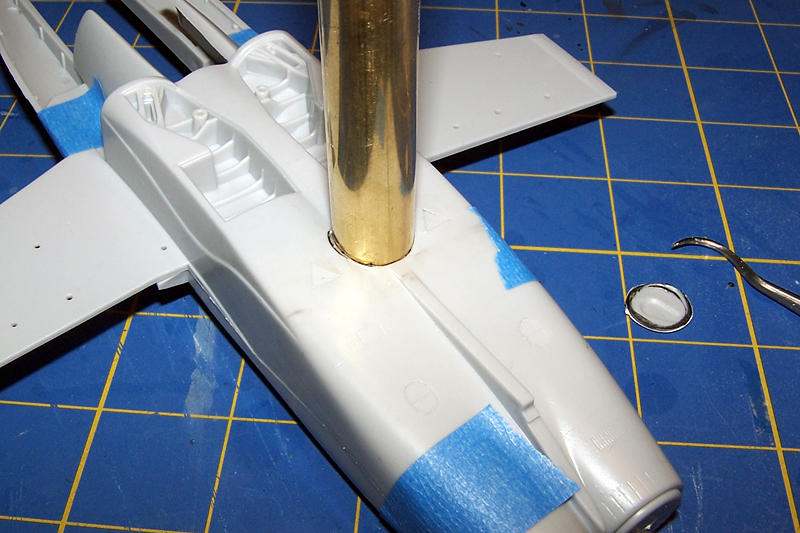
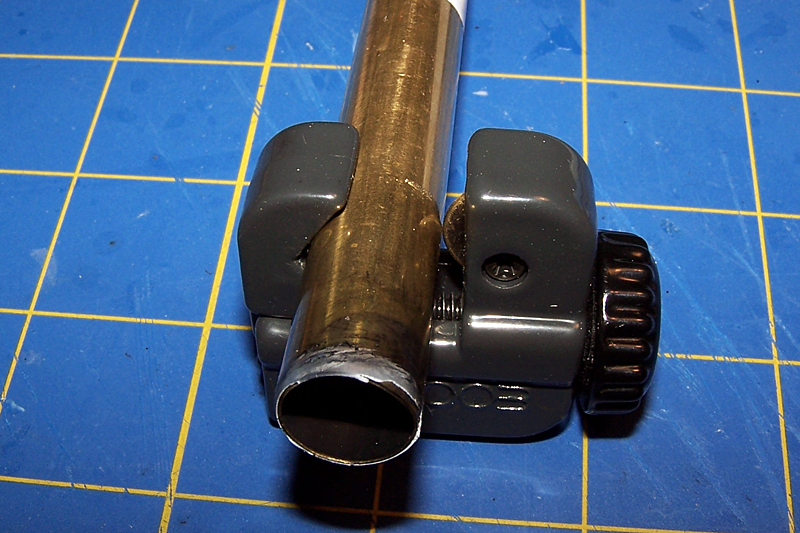
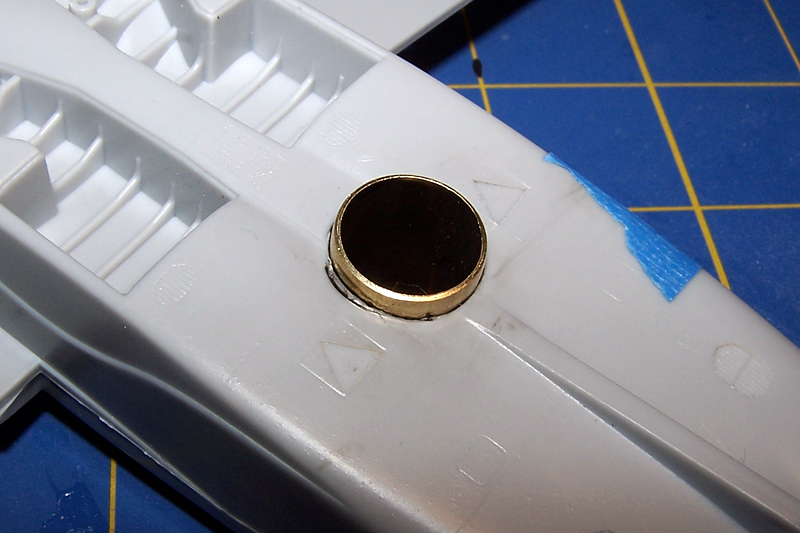
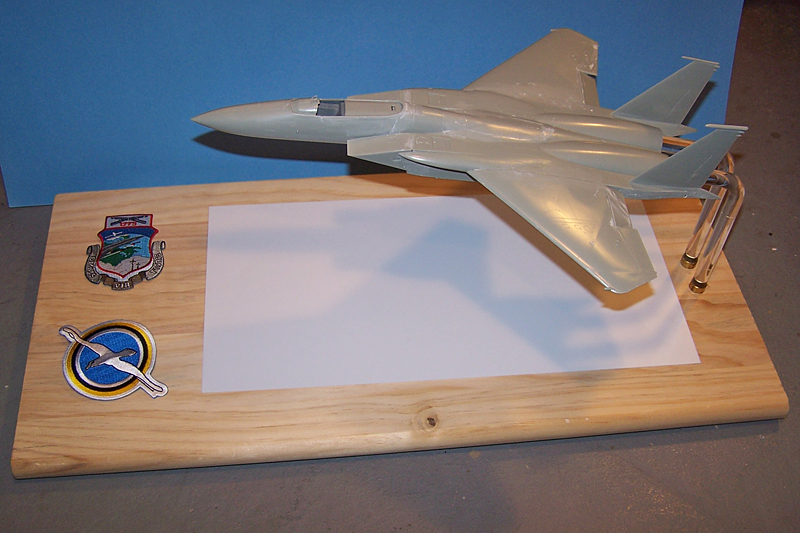
display stand on a completed model. For example, the brass tube supports may
have to be placed before the fuselage is closed up. You can tape the fuselage
together to determine where they should go, and even keep them taped when making
the holes. In fact, in some cases, the holes may go through the exhaust can and not the
fuselage itself.
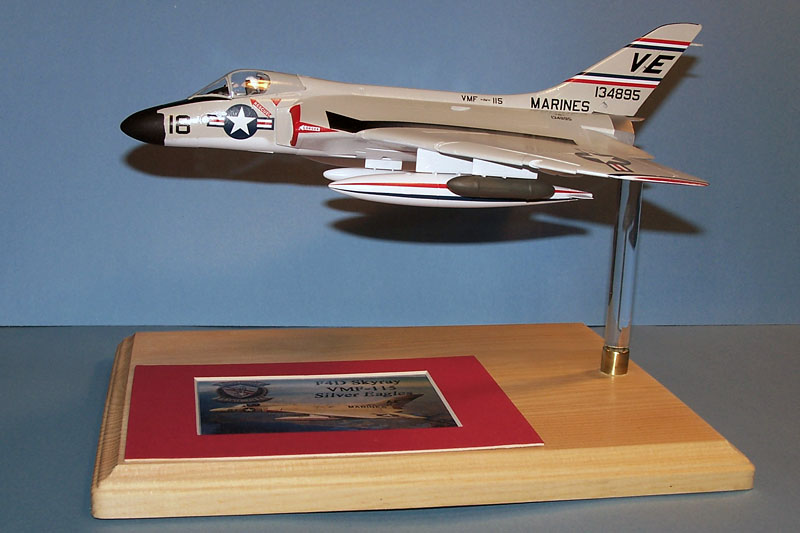
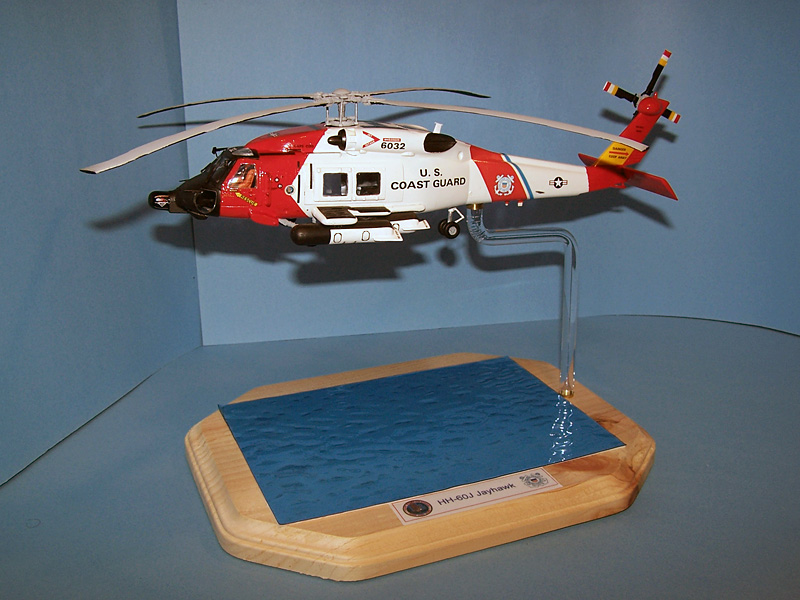
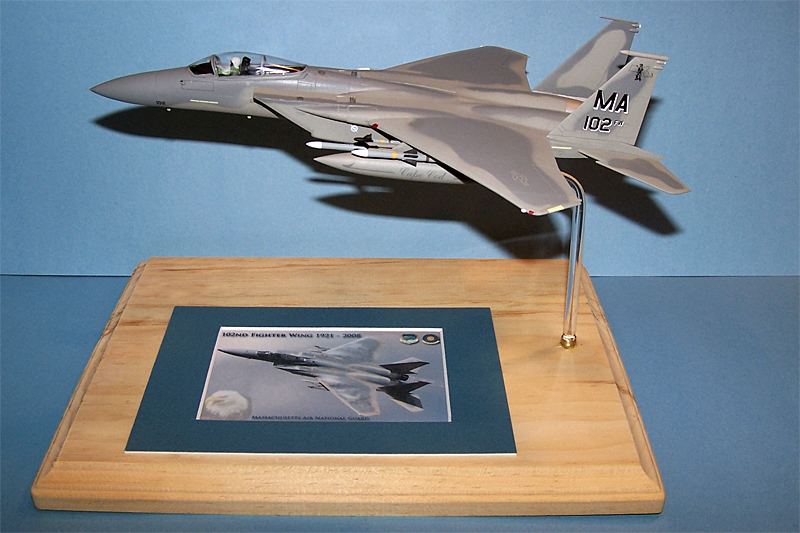
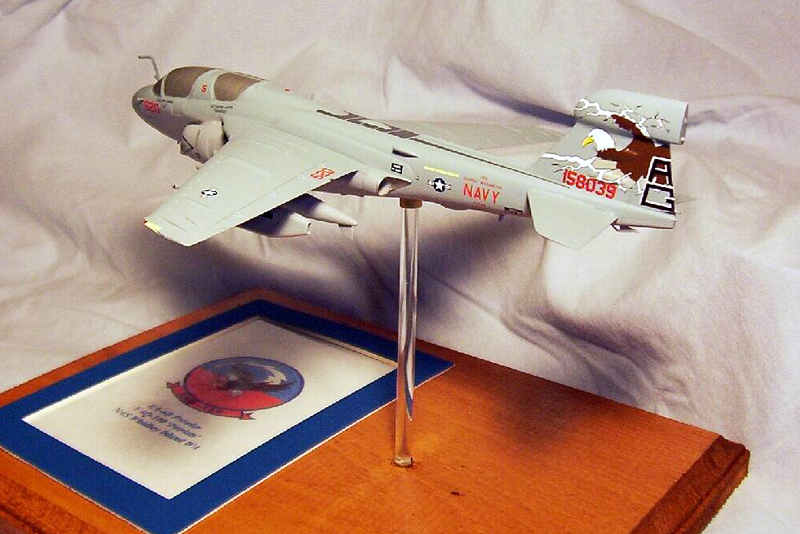
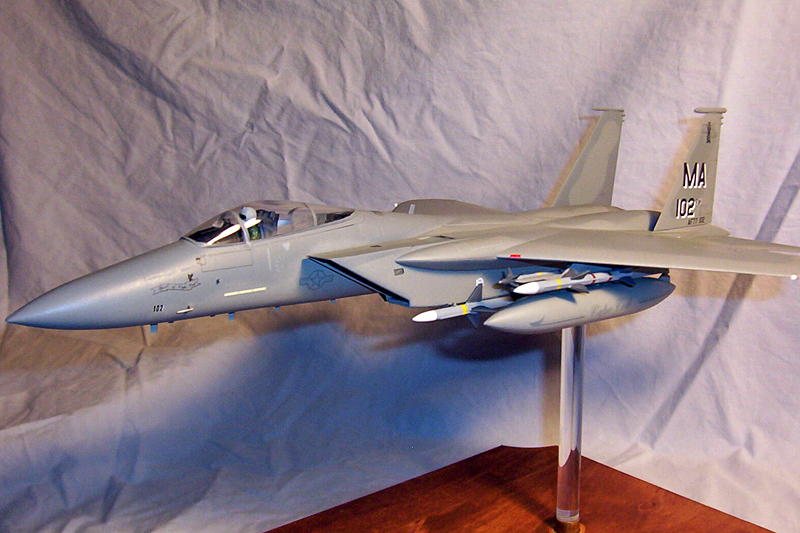
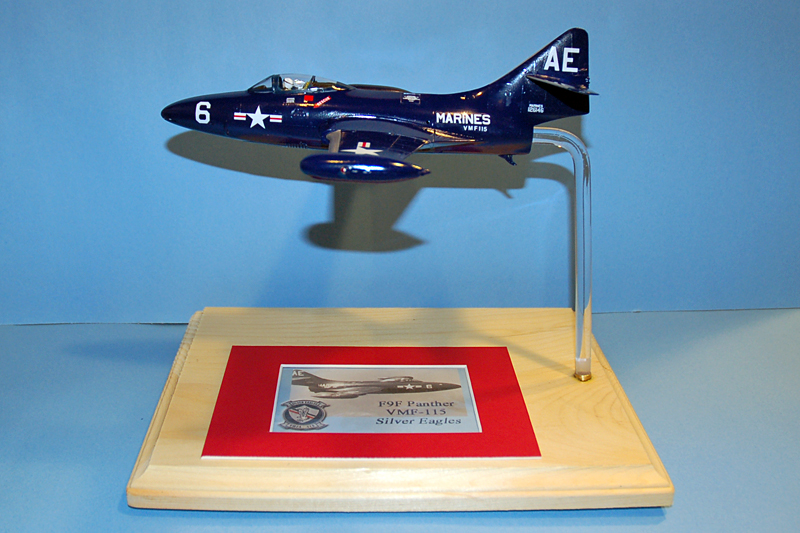
Have a look at the completed samples in this article to give you some ideas of
different styles. Keep in mind, that there are 3 major parts to the display -
the model attachment, the rod style and the base attachment. The don't have
to be done all at the same time. Some other
things to decide....
-
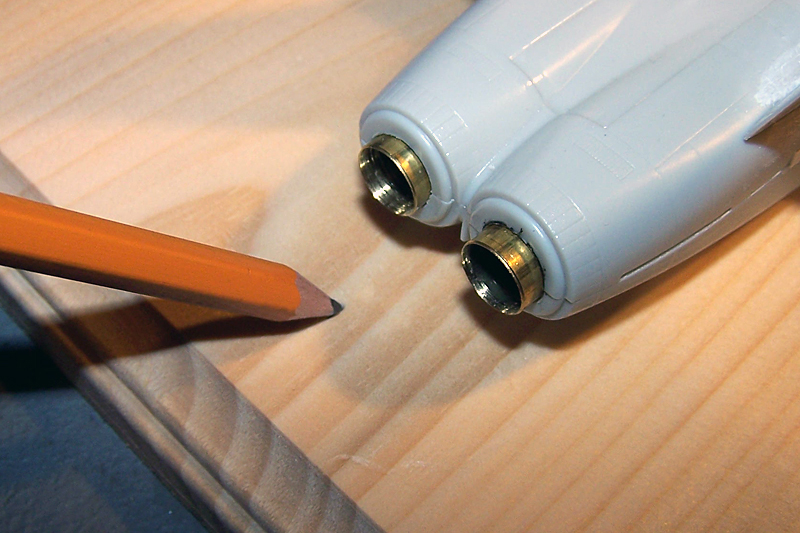
Will the rod go into the exhaust nozzle(s) or underneath.
If in the nozzle, be sure the acrylic rod will fit through the nozzle
itself
-
Will the rod be curved
-
What size rod should be used to accommodate the weight
As a rule of thumb, I use the following acrylic rod sizes for:
-
1/72nd : 1/4 inch
-
1/48th: 3/8 or 1/2 inch depending on aircraft. F-15s and
A-10s would use 1/2 due to the weight, and a Legacy F/A-18 would use 3/8
due to the size of the exhaust nozzles and lighter weight.
-
1/32nd: I have not done any in this scale, but 1/2 or
larger would be used.
For the brass tube, I use the same size, or slightly larger than
the acrylic rod. The acrylic rod can be sanded to fit small variations if need
be. I think aluminum tubing would suffice as well, and plastic tubing should
work but the wall is thicker to achieve the same strength.
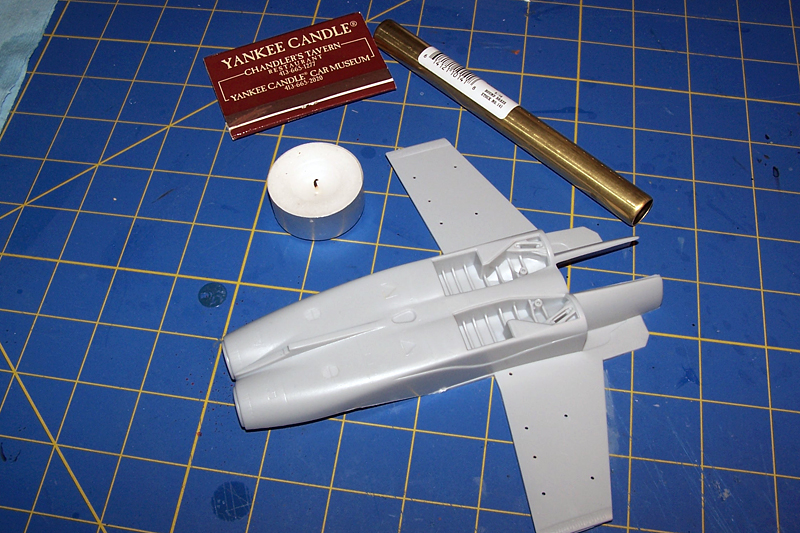
Materials needed:
-
Wood base. I get mine usually from a craft store like
Michaels.
-
Acrylic rod. Plastruct and TAP Plastics are 2 sources I
have used.
-
Brass or aluminum tube. K&S Metals is a brand I have
used.
-
5-minute epoxy
-
Razor saw for cutting acrylic rod or aluminum tube
-
Plumber's tube cutter for brass tubing
-
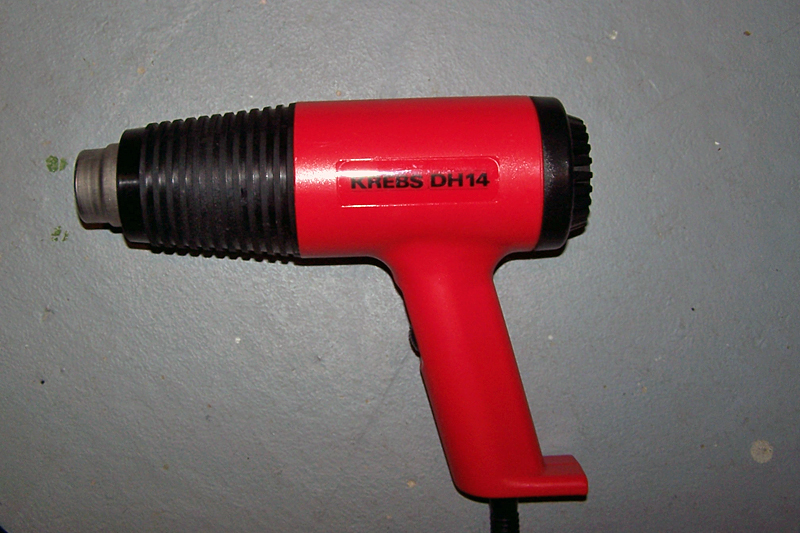
Heat gun, or oven to heat acrylic rod if bending. If a
straight, vertical rod is used, these are not needed
-
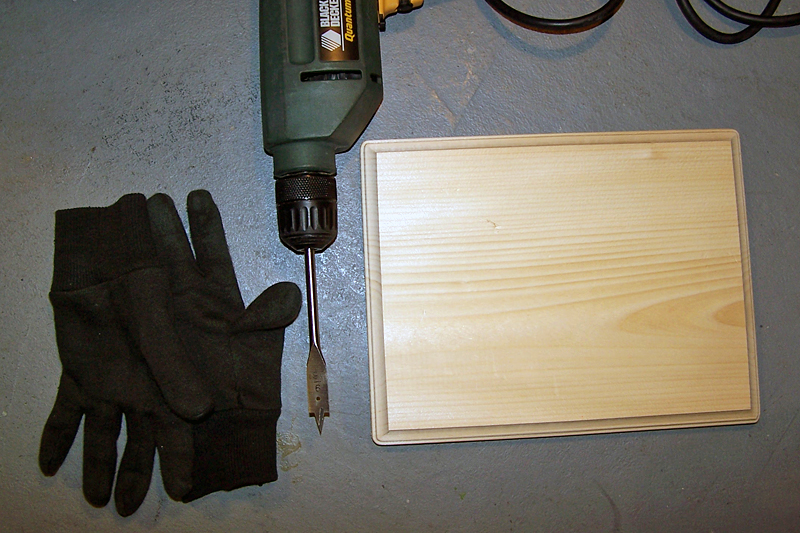
Drill for making hole(s) in wood base. Wood-boring bits
are the best for this.
-
Motor tool for making or cleaning up hole(s) in model
-
Candle for heating rod to make hole(s) in model, if using
this method.
-
Measuring tape or ruler
-
Marker
-
Wood glue and wood putty
-
Gloves, cotton ones are the best
-
Wood base finish...paint, varnish, etc
|